How to Build a Gaming PC: Your Ultimate DIY Guide
July 24, 2026 19 min read 3,850 words
Unlock unparalleled gaming performance and save money by assembling your dream machine with our expert, easy-to-follow instructions.
Start Building Your PC
Understanding Core Gaming PC Components
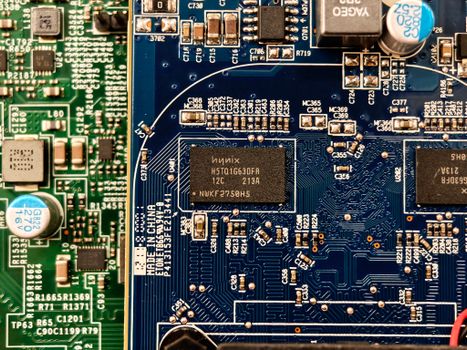 Photo: Adriano Ponte Abreu / Pexels
Embarking on the journey of how to build a gaming PC begins with understanding its fundamental components. Think of these as the vital organs of your digital beast, each playing a crucial role in its overall performance and capabilities. Making informed decisions here will dictate your gaming experience, from frame rates to graphical fidelity. Let's break down the essential parts you'll need to consider.
First up is the Central Processing Unit (CPU), often called the 'brain' of your computer. For gaming, a powerful CPU like an Intel Core i5/i7/i9 or an AMD Ryzen 5/7/9 is essential. It handles everything from game logic to AI and physics. While a high-end CPU is beneficial, it's crucial not to overspend here at the expense of your graphics card, as the GPU is generally more critical for gaming performance. Consider the 'core count' and 'clock speed' when comparing CPUs. More cores are better for multitasking and some newer games, while higher clock speeds generally mean snappier single-threaded performance. Look for CPUs with integrated coolers or plan to purchase an aftermarket one if your chosen CPU doesn't include a sufficient stock option.
Next, and arguably the most important component for a gaming PC, is the Graphics Processing Unit (GPU), or graphics card. This powerhouse renders all the visuals you see on your screen. Brands like NVIDIA (GeForce RTX/GTX series) and AMD (Radeon RX series) dominate the market. Your GPU choice will directly impact the resolution, frame rate, and graphical settings you can achieve in games. Aim for the best GPU you can afford within your budget, as it will have the most significant impact on your gaming experience. Factors like VRAM (video memory) and CUDA cores/stream processors are key specifications to compare. For 1080p gaming, a mid-range card might suffice, but for 1440p or 4K, you'll need a much more potent GPU.
The Motherboard acts as the central nervous system, connecting all your components and allowing them to communicate. It needs to be compatible with your chosen CPU (check socket type, e.g., LGA 1700 for Intel or AM5 for AMD), RAM type (DDR4 or DDR5), and other peripherals. Motherboards come in various sizes (ATX, Micro-ATX, Mini-ITX) and offer different features like Wi-Fi, numerous USB ports, and M.2 slots for fast storage. Don't skimp entirely on the motherboard; a good one provides stability, better power delivery, and options for future upgrades. Pay attention to the chipset, as it dictates features and compatibility with specific CPU generations.
Choosing the right motherboard can significantly impact your PC's longevity and upgrade path.
Random Access Memory (RAM) is your PC's short-term memory, used to store data that the CPU needs to access quickly. For gaming, 16GB of DDR4 or DDR5 RAM is generally considered the sweet spot for modern titles, with 32GB offering more headroom for multitasking or future-proofing. Speed (measured in MHz) andCAS Latency (CL) are important specifications; higher speeds and lower latencies generally result in better performance. Ensure your RAM is compatible with your motherboard and CPU.
Storage comes in two main forms: Hard Disk Drives (HDDs) and Solid State Drives (SSDs). HDDs offer large capacities at a lower cost, ideal for storing large game libraries or media files. However, SSDs are significantly faster, leading to quicker boot times, faster game loading, and snappier overall system responsiveness. NVMe SSDs, which connect directly to the motherboard via an M.2 slot, are the fastest option available and highly recommended for your operating system and frequently played games. A common setup involves a smaller NVMe SSD for the OS and a few key games, complemented by a larger SATA SSD or HDD for additional storage.
Finally, the Power Supply Unit (PSU) delivers electricity to all your components. It's crucial to choose a PSU with sufficient wattage to power your entire system, especially your GPU, and to select one from a reputable brand with a good efficiency rating (e.g., 80 Plus Bronze, Gold, or Platinum). An underrated or unreliable PSU can lead to system instability or even component damage. Use online PSU calculators to estimate your system's power needs. Don't forget the PC Case, which houses all your components. Cases come in various sizes and styles, offering different airflow characteristics, cable management options, and aesthetics. Choose one that fits your motherboard size and has enough space for your GPU and cooling solutions. Good airflow is vital for keeping your components cool and performing optimally, preventing thermal throttling.
Step-by-Step Assembly Guide for Your Gaming Rig
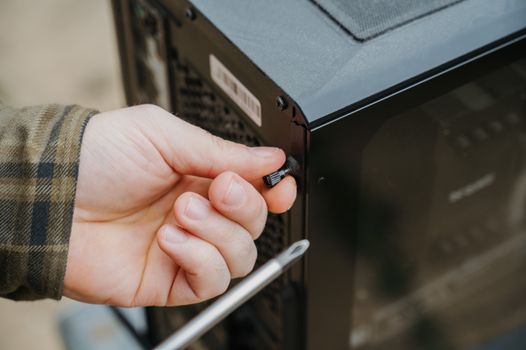 Photo: Anete Lusina / Pexels
Now that you have a solid understanding of the components, it's time for the exciting part: assembling your gaming PC. This section will walk you through the process step-by-step, ensuring you approach each stage with confidence and precision. Before you begin, ensure you have a clean, well-lit workspace with plenty of room. A magnetic-tipped Phillips head screwdriver is your primary tool, along with some zip ties or Velcro straps for cable management.
**Step 1: Prepare the Motherboard.** Lay your motherboard on its anti-static bag or a non-conductive surface. This is where the delicate installations begin. First, open the CPU socket lever, carefully align your CPU with the triangular or arrow marker on both the CPU and the socket, and gently place it in. Do not force it. Once seated, close the lever to secure it. Next, if your CPU didn't come with a pre-applied thermal paste, apply a pea-sized dot to the center of the CPU's heat spreader. Install your CPU cooler, following its specific instructions, ensuring it makes good contact and is securely mounted. Finally, open the RAM slots' clips, align your RAM modules with the notch, and press firmly until the clips snap into place. Most motherboards require RAM to be installed in specific dual-channel slots (check your motherboard manual).
**Step 2: Prepare the Case and Install the Motherboard.** Remove both side panels of your PC case. Install the I/O shield (the metal plate for your motherboard's ports) into the back of the case if it didn't come pre-attached to your motherboard. Next, install the motherboard standoffs if they aren't pre-installed. These small screws lift the motherboard off the case to prevent short circuits. Carefully lower your assembled motherboard into the case, aligning it with the standoffs and the I/O shield. Screw the motherboard into place using the appropriate screws provided with your case, ensuring it's snug but not overtightened.
**Step 3: Install the Power Supply Unit (PSU).** Mount the PSU into its designated bay, typically at the bottom or top rear of the case. Ensure the fan faces the correct direction (usually downwards if there's a vent, or upwards if drawing air from inside the case). Secure it with screws from the outside of the case. Now, connect the essential power cables to your motherboard: the large 24-pin ATX power connector and the 4/8-pin CPU power connector (usually at the top left of the motherboard). If your PSU is modular or semi-modular, only attach the cables you need to the PSU itself.
**Step 4: Install Storage Drives.** For NVMe SSDs, locate the M.2 slot(s) on your motherboard, remove the tiny screw or standoff, insert the SSD at an angle, and then push it down to secure it with the screw/standoff. For SATA SSDs or HDDs, mount them into the drive bays provided by your case. Connect a SATA data cable from the drive to a SATA port on your motherboard, and then connect a SATA power cable from your PSU to the drive.
**Step 5: Install the Graphics Card (GPU).** Locate the appropriate PCIe x16 slot on your motherboard (usually the top, reinforced slot). Remove the corresponding expansion slot cover(s) from the back of your case. Carefully align your GPU with the slot and press it down firmly until it clicks into place. Secure the GPU to the case with its retaining screw(s). Connect the required PCIe power cables from your PSU to the GPU. Modern high-end GPUs often require two or even three 8-pin PCIe power connectors.
**Step 6: Connect Case Cables and Final Touches.** This step involves connecting all the small, fiddly cables from your case to the motherboard. These include the front panel USB ports, audio jacks, and the crucial front panel header (power button, reset button, HDD LED, power LED). Refer to your motherboard manual for the exact pin layout of the front panel header, as this is often the most confusing part for newcomers. Connect any case fans to the appropriate fan headers on your motherboard. Once all components are installed and connected, perform initial cable management. Use zip ties or Velcro straps to bundle cables and route them neatly behind the motherboard tray, improving airflow and aesthetics. Double-check all connections to ensure everything is securely plugged in. Your physical build is now complete, preparing you for the software installation phase.
Software Installation and Essential Setup for Optimal Performance
 Photo: Tranmautritam / Pexels
With the hardware meticulously assembled, the next critical phase in how to build a gaming PC is the software installation and initial setup. This stage brings your components to life, allowing them to function as a cohesive gaming machine. Proper software installation and configuration are just as important as the hardware itself for achieving optimal performance, stability, and security. Neglecting these steps can lead to frustrating issues, so pay close attention.
**Step 1: Install the Operating System (OS).** The vast majority of gaming PCs run on Microsoft Windows, with Windows 10 and 11 being the current standards. You'll need a USB flash drive (at least 8GB) with the Windows installation media created using Microsoft's Media Creation Tool. Plug the USB drive into your newly built PC and power it on. As it boots, repeatedly press the designated key (often Del, F2, F10, or F12 – check your motherboard manual) to enter the BIOS/UEFI settings. Navigate to the boot order menu and set your USB drive as the primary boot device. Save and exit, and your PC will boot from the USB, launching the Windows installer. Follow the on-screen prompts, selecting your preferred language, time, and keyboard layout. When prompted, choose 'Custom: Install Windows only (advanced)' and select the NVMe SSD (or primary SSD) you installed earlier as the destination drive. Windows will then install itself, and your PC will restart several times during the process. Once complete, you'll be guided through initial setup, creating an account, and configuring basic settings.
Optimizing Windows for gaming after installation is a recommended next step.
**Step 2: Install Drivers.** This is a crucial step that many first-time builders overlook or rush. Drivers are software programs that allow your operating system to communicate with your hardware components. Without the correct drivers, your GPU won't perform optimally, your network card won't connect to the internet, and your audio won't work. Start by installing the chipset drivers for your motherboard, which you can usually find on your motherboard manufacturer's website. Next, download and install the latest graphics card drivers directly from NVIDIA (GeForce Experience) or AMD (Radeon Software). These are absolutely vital for gaming performance. Then, install drivers for your network card (Ethernet and/or Wi-Fi), audio, and any other peripherals. Many drivers can be found on your motherboard manufacturer's support page. Windows Update will often install some generic drivers, but it's best to get the latest, specific drivers directly from the component manufacturers for best performance and stability.
**Step 3: Update Windows and BIOS/UEFI.** Once your drivers are installed, ensure your Windows installation is fully up to date. Go to Settings > Update & Security (or Windows Update) and check for updates. Install all pending updates and restart your PC as prompted. Keeping your OS current is important for security and performance. Additionally, consider updating your motherboard's BIOS/UEFI firmware. While not always strictly necessary immediately, a BIOS update can improve compatibility, add new features, and fix bugs. This process is more advanced and varies by motherboard manufacturer, so consult your manual and proceed with caution. Generally, you download the BIOS file to a USB drive and update it through the BIOS/UEFI interface itself.
**Step 4: Install Essential Software and Games.** With your system drivers and OS up to date, you're ready to install your gaming platforms and games. Download and install clients like Steam, Epic Games Store, GOG Galaxy, Battle.net, or Origin/EA App. It's advisable to install your most frequently played games on your fastest SSD for quick loading times. Install any other essential software you use daily, such as web browsers, anti-virus programs, and communication tools. Consider a good antivirus solution to protect your investment. Regularly defragmenting HDDs (not SSDs) and running disk cleanup utilities can help maintain system health. Also, keep an eye on your component temperatures using monitoring software (like HWMonitor or MSI Afterburner) to ensure everything is running within safe limits, especially during intense gaming sessions. This proactive approach will help you maintain a high-performing and stable gaming environment for years to come.
Optimizing Performance and Avoiding Common PC Building Mistakes
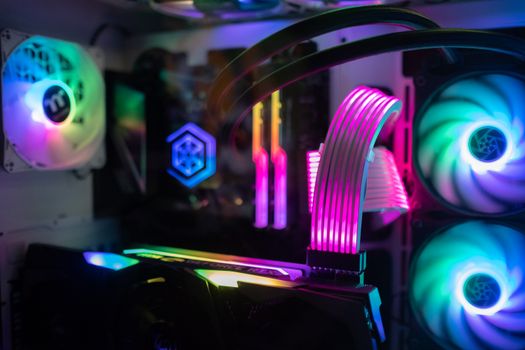 Photo: Timur Kozmenko / Pexels
Building your own gaming PC is a rewarding experience, but the journey doesn't end with successful POST (Power On Self Test). To truly maximize your investment and ensure a smooth, long-lasting gaming experience, you need to understand optimization techniques and, perhaps more importantly, how to avoid common pitfalls. Learning how to build a gaming PC correctly means not just assembly, but also smart usage.
**Performance Optimization Tips:**
* **Monitor Temperatures:** Overheating is a silent killer of performance and component longevity. Use software like HWMonitor, MSI Afterburner, or NZXT CAM to keep an eye on your CPU and GPU temperatures, especially under load. If temperatures are consistently high, consider improving case airflow, upgrading your CPU cooler, or reapplying thermal paste.
* **Overclocking (Cautiously):** For advanced users, overclocking your CPU or GPU can yield significant performance gains. However, this increases heat and power consumption. Start with small increments, thoroughly test for stability, and ensure adequate cooling. Always research specific guides for your components.
* **Enable XMP/DOCP for RAM:** In your BIOS/UEFI, enable the eXtreme Memory Profile (XMP for Intel) or DOCP (Direct Overclock Profile for AMD) to run your RAM at its advertised speeds. Without this, your RAM might be running at a slower default speed, leaving performance on the table.
* **Driver Updates:** Regularly update your GPU drivers. NVIDIA and AMD frequently release new drivers that include performance optimizations for the latest games and bug fixes. Check for updates every few weeks.
* **Game Settings Optimization:** Don't just crank every setting to 'Ultra.' Experiment with in-game graphics settings. Often, reducing one or two demanding settings (like shadows or anti-aliasing) can provide a significant FPS boost with minimal visual impact.
* **Clean Up Background Processes:** Close unnecessary applications running in the background while gaming. These consume CPU, RAM, and GPU resources that could be dedicated to your game.
* **Keep Your System Clean:** Physically clean your PC regularly. Dust buildup significantly impedes airflow and cooling efficiency. Use compressed air to clear dust from fans, heatsinks, and vents every few months.
**Common PC Building Mistakes to Avoid:**
* **Ignoring Static Electricity:** Static discharge can fry sensitive components. Always ground yourself before touching components by touching a metal part of your case or wearing an anti-static wrist strap.
* **Forcing Components:** If a component doesn't fit easily, stop. Re-check alignment, pins, and compatibility. Forcing parts, especially CPUs or RAM, can cause irreversible damage.
* **Incorrect CPU Cooler Installation:** A poorly installed CPU cooler is a primary cause of overheating. Ensure even pressure, proper thermal paste application, and that all mounting screws/clips are securely fastened.
* **Bad Cable Management:** While primarily aesthetic, poor cable management can obstruct airflow, leading to higher temperatures. Take the time to route cables neatly behind the motherboard tray and bundle them.
* **Forgetting the I/O Shield:** This small metal plate often gets overlooked until everything else is installed. It's much easier to install before the motherboard goes in.
* **Incorrect RAM Placement:** Many motherboards require RAM sticks to be installed in specific slots for dual-channel performance. Consult your motherboard manual.
* **Inadequate PSU Wattage:** An underpowered PSU can lead to system instability, crashes, or even damage. Always choose a PSU with sufficient wattage, with some headroom for future upgrades.
* **Not Installing All Drivers:** Relying solely on Windows Update for drivers is a mistake. Always install the latest chipset and GPU drivers directly from the manufacturers' websites.
* **Testing Outside the Case (Optional but Recommended):** For first-time builders, performing a 'bench test' with the CPU, cooler, RAM, and GPU connected to the motherboard and PSU outside the case can help identify faulty components before full assembly, saving troubleshooting time.
* **Forgetting to Peel Protective Films:** Some components, especially CPU coolers and GPU heatsinks, come with protective plastic films. Forgetting to peel these off can severely hinder cooling performance. Always check before installation.
By following these optimization tips and being mindful of common mistakes, you'll not only build a functional gaming PC but also one that performs reliably at its peak potential for years to come. The effort invested in careful assembly and thoughtful software setup pays dividends in a superior gaming experience.
