How to Build a Gaming PC: Your Ultimate DIY Guide
June 19, 2026 20 min read 3,913 words
Unlock unparalleled gaming performance and save money by assembling your dream PC with our expert instructions.
Start Building Now
Understanding Your Gaming PC Components
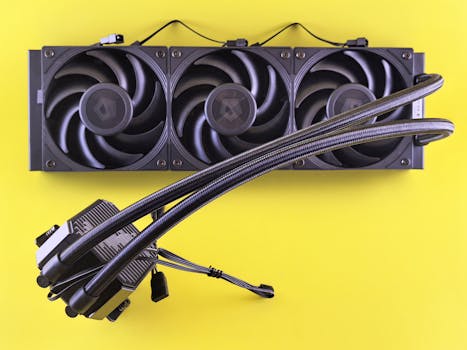 Photo: Andrey Matveev / Pexels
Embarking on the journey of building your own gaming PC is an exciting endeavor that promises not only a powerful machine tailored to your exact needs but also a deep understanding of the technology that drives your digital adventures. Before you even think about screwdrivers and thermal paste, the foundational step is to thoroughly understand the core components that make up a gaming rig. Each part plays a critical role, and knowing their functions and how they interact is paramount to making informed decisions that align with your budget and performance expectations. This section will demystify the essential hardware, guiding you through the selection process for each piece.
First and foremost, the **Central Processing Unit (CPU)**, often called the 'brain' of the computer, is responsible for executing instructions and performing calculations. For gaming, you'll want a CPU with a good balance of core count and high clock speed. Intel's Core i5/i7/i9 series and AMD's Ryzen 5/7/9 series are popular choices, offering excellent multi-threaded performance for modern games and multitasking. The higher the core count, generally the better it handles complex tasks and future-proofs your system, while higher clock speeds directly impact in-game frame rates. When selecting a CPU, pay close attention to its socket type (e.g., LGA 1700 for Intel, AM5 for AMD), as this dictates which motherboards are compatible.
Choosing the right CPU is a critical first step in your build.
Next, the **Graphics Processing Unit (GPU)**, or graphics card, is arguably the single most important component for gaming performance. This is where the bulk of your gaming budget will likely go, and for good reason. The GPU renders all the visuals you see on your screen, from detailed environments to fluid character animations. NVIDIA's GeForce RTX series and AMD's Radeon RX series dominate the market, offering various performance tiers. When choosing a GPU, consider the resolution and refresh rate of your monitor. A high-end card might be overkill for 1080p gaming at 60Hz, while a mid-range card might struggle with 4K gaming. Look at benchmarks for the games you intend to play to gauge real-world performance.
The **Motherboard** acts as the central nervous system, connecting all your components and allowing them to communicate. Its compatibility with your chosen CPU (socket type) and RAM (DDR4 or DDR5) is non-negotiable. Beyond that, consider the number of PCIe slots for your GPU and other expansion cards, the number of M.2 slots for NVMe SSDs, USB ports, and Wi-Fi capabilities. Chipsets (e.g., B650, Z790) also determine features like overclocking support and available connectivity. While it doesn't directly impact gaming performance, a good motherboard ensures stability and expandability.
**Random Access Memory (RAM)** is your system's short-term memory, used to store data that the CPU needs to access quickly. For gaming, 16GB is generally the sweet spot, allowing for smooth gameplay and multitasking. While 32GB offers more headroom, it's often not necessary unless you're also doing heavy video editing or streaming. Look for DDR4 or the newer DDR5 modules, ensuring compatibility with your motherboard. Speed (measured in MHz) andCAS Latency (CL) are important; higher speeds and lower latencies generally translate to better performance. However, diminishing returns apply, so don't overspend on excessively fast RAM unless you're chasing every last frame.
**Storage** comes in various forms, with Solid State Drives (SSDs) being the preferred choice for gaming due to their speed. NVMe M.2 SSDs are the fastest, offering lightning-fast boot times and game load times. A 1TB NVMe drive is a good starting point for your operating system and a handful of large games. For additional storage, especially for a large game library or media files, a larger SATA SSD or even a traditional Hard Disk Drive (HDD) can be a cost-effective solution. The combination of a fast NVMe for your OS and primary games, and a larger, slower drive for everything else, is a common and efficient setup.
Finally, the **Power Supply Unit (PSU)** provides electricity to all your components. It's crucial not to skimp on the PSU, as a cheap or underpowered unit can lead to instability or even damage other components. Calculate the total wattage required by your chosen parts (many online calculators can help with this) and then add a buffer (100-200W) for future upgrades and efficiency. Look for PSUs with 80 Plus certifications (Bronze, Gold, Platinum, Titanium), which indicate their efficiency. Modular or semi-modular PSUs offer better cable management, making your build cleaner and improving airflow. Understanding these components is the first giant leap towards successfully building your custom gaming PC.
Step-by-Step Assembly: Bringing Your Rig to Life
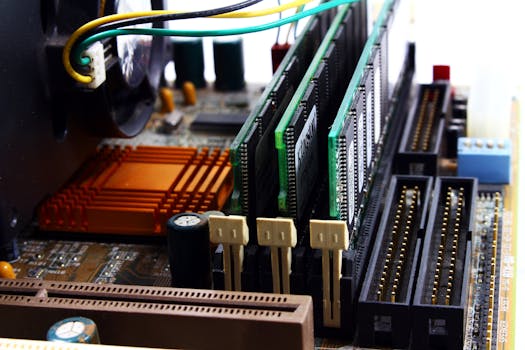 Photo: Valentine Tanasovich / Pexels
With all your carefully selected components in hand, the real fun begins: assembly. While it might seem daunting, approaching the build systematically, step-by-step, will make the process smooth and enjoyable. Remember to work on a clean, static-free surface, and consider wearing an anti-static wrist strap to protect your sensitive electronics. Take your time, consult your component manuals, and don't be afraid to double-check your work. This section will walk you through the essential stages of bringing your gaming PC to life.
**1. Prepare Your Workspace and Motherboard:** Unpack your motherboard and place it on its anti-static bag or a non-conductive surface. This is where you'll install the CPU, CPU cooler, RAM, and M.2 SSD before it goes into the case. This 'out-of-case' assembly can be significantly easier. Open the CPU socket retention arm and carefully align your CPU with the triangular or arrow marker on both the CPU and the socket. Gently place the CPU into the socket – it should drop in without force. Close the retention arm to secure it. Next, install your RAM sticks into the appropriate slots (consult your motherboard manual for dual-channel or quad-channel configurations, usually alternating slots). Push firmly until the clips on both ends snap into place. If you have an M.2 NVMe SSD, locate the M.2 slot(s) on your motherboard, remove the tiny screw, insert the SSD at an angle, and then push it down and secure it with the screw.
**2. Install the CPU Cooler:** If you're using the stock cooler that came with your CPU, follow its instructions for installation. For aftermarket air coolers or All-in-One (AIO) liquid coolers, you'll likely need to install a backplate behind the motherboard first. Apply a small pea-sized dot of thermal paste to the center of your CPU (unless your cooler comes with it pre-applied) and then carefully mount the cooler, ensuring even pressure. Connect the CPU fan cable to the 'CPU_FAN' header on your motherboard. For AIOs, mount the radiator to an available fan slot in your case (usually top or front) and connect the pump and fan cables.
**3. Prepare the PC Case:** Before installing the motherboard, install the I/O shield (if your motherboard didn't come with one integrated) into the back of the case. Also, install any standoffs that aren't pre-installed in your case – these are small risers that prevent the motherboard from shorting against the metal case. Refer to your motherboard's screw hole pattern to determine which standoffs are needed.
**4. Install the Motherboard:** Carefully lower your assembled motherboard into the case, aligning the screw holes with the standoffs. Ensure the I/O ports align with the I/O shield. Once aligned, screw the motherboard firmly into place, but don't overtighten.
**5. Install the Graphics Card (GPU):** Locate the primary PCIe x16 slot on your motherboard (usually the top-most reinforced slot). Remove the corresponding PCIe slot cover(s) from the back of your case. Open the retention clip on the PCIe slot, carefully align your GPU, and push it firmly into the slot until the clip snaps back into place. Secure the GPU to the case with screws. Connect the necessary PCIe power cables from your power supply to the GPU (these are usually 6-pin or 8-pin connectors).
**6. Install the Power Supply Unit (PSU):** Mount your PSU into its designated bay in the case (usually at the bottom rear). Secure it with screws. Now, connect the main 24-pin ATX power cable to the motherboard, the 8-pin (or 4+4-pin) CPU power cable to the motherboard (usually at the top left), and any necessary SATA power cables for storage drives. If your PSU is modular or semi-modular, only connect the cables you need.
**7. Install Storage Drives:** If you have 2.5-inch SATA SSDs or 3.5-inch HDDs, install them into their respective drive bays in your case. Connect a SATA data cable from each drive to a SATA port on your motherboard, and a SATA power cable from your PSU to each drive.
**8. Connect Case Cables:** This is where things can get a bit fiddly. Connect the small front panel connectors (power switch, reset switch, HDD LED, power LED) to the corresponding pins on your motherboard (consult your motherboard manual for their exact location and polarity). Connect USB 2.0, USB 3.0, and USB-C headers from your case to the motherboard. Also, connect any case fan cables to fan headers on the motherboard. Take your time with these; they are small but crucial.
**9. Cable Management:** A clean build isn't just for aesthetics; it also improves airflow. Route cables behind the motherboard tray and use zip ties or Velcro straps to bundle them neatly. This step can be time-consuming but is well worth the effort. Once all components are installed and cables are managed, close up your case. You're almost there! The next step is to install the operating system and drivers to get your new gaming PC fully operational.
You may also find escort advertising pricing in Canada, compare listing and promotion costs, advertising plans on Escorts.vc useful.
Software Setup and Optimization for Peak Performance
 Photo: Paras Katwal / Pexels
Congratulations! You've successfully assembled your gaming PC. The hardware is in place, but your journey isn't over yet. The next crucial phase involves installing the necessary software and optimizing your system to ensure you're getting every ounce of performance out of your new rig. This involves installing the operating system, downloading drivers, and fine-tuning settings for the best gaming experience. Skipping these steps can lead to frustrating performance issues or even system instability, so pay close attention to this vital stage of your build.
Optimizing your gaming PC is key to enjoying your hard work.
**1. Installing Your Operating System:** The first piece of software you'll need is your operating system (OS). For most gamers, this will be Windows 10 or Windows 11. You'll need a USB flash drive (at least 8GB) with the Windows installation media created using Microsoft's Media Creation Tool. Plug the USB drive into your new PC, connect your monitor, keyboard, and mouse, and power it on. Your PC should automatically boot from the USB drive. If not, you may need to enter the BIOS/UEFI (usually by pressing Del, F2, or F10 during startup) and change the boot order to prioritize the USB drive. Follow the on-screen prompts to install Windows, selecting your primary NVMe SSD as the installation drive. During installation, you'll be asked for a product key; you can enter it then or later.
**2. Installing Drivers:** Once Windows is installed and you've completed the initial setup, the next critical step is to install all necessary drivers. Drivers are software programs that allow your operating system to communicate with your hardware components. Without them, your GPU won't perform optimally, your network card won't connect to the internet, and your audio won't work. Start by installing your motherboard chipset drivers. You can usually find these on your motherboard manufacturer's website. Download them to another computer, transfer them via USB, or if your network card is working, download them directly. After chipset drivers, install your graphics card drivers. This is paramount for gaming performance. Visit NVIDIA's or AMD's website, select your specific GPU model, and download the latest drivers. Run the installer and perform a clean installation. Finally, install drivers for any other components that Windows might not have automatically recognized, such as Wi-Fi adapters, audio drivers (if not covered by chipset drivers), and any peripherals. Many motherboard manufacturers provide a utility that can help install all necessary drivers from a single interface.
**3. BIOS/UEFI Configuration:** While not strictly necessary for initial boot-up, configuring your BIOS/UEFI settings can unlock additional performance and stability. Restart your PC and enter the BIOS/UEFI. Here are a few key settings to check: Enable XMP (Extreme Memory Profile) or DOCP (Direct Overclock Profile) for AMD systems to ensure your RAM runs at its advertised speed. Otherwise, it might default to a slower speed. Verify that your boot drive is correctly prioritized. You might also want to check fan curves to ensure adequate cooling without excessive noise. For advanced users, CPU overclocking or undervolting can be explored, but this is an advanced topic and should only be attempted after thorough research.
**4. Windows Optimization for Gaming:** Windows itself has several settings you can tweak for better gaming performance. Go to 'Settings > System > Display > Graphics settings' and add your games, then set them to 'High performance'. Disable unnecessary background apps ('Settings > Privacy > Background apps'). Ensure your power plan is set to 'High performance' (search for 'Edit power plan' in the Windows search bar). Consider disabling Game Bar and Game Mode if they cause issues, though for many, Game Mode can be beneficial. Keep Windows updated, as updates often include performance improvements and security patches.
**5. Game Launcher and Software Installation:** Install your preferred game launchers (Steam, Epic Games Store, GOG Galaxy, Battle.net, etc.) and begin downloading your favorite titles. Ensure your games are installed on your fast NVMe SSD for the quickest loading times. Install any monitoring software you might find useful, such as MSI Afterburner for GPU monitoring and overclocking, or HWMonitor for general system temperatures and voltages. Regularly check for driver updates for your GPU and motherboard, as manufacturers frequently release optimized versions that can improve performance and fix bugs. By diligently following these software setup and optimization steps, your custom-built gaming PC will be ready to deliver an exceptional and immersive gaming experience, making all your hard work worthwhile.
Common Pitfalls and Essential Tips for Your First Build
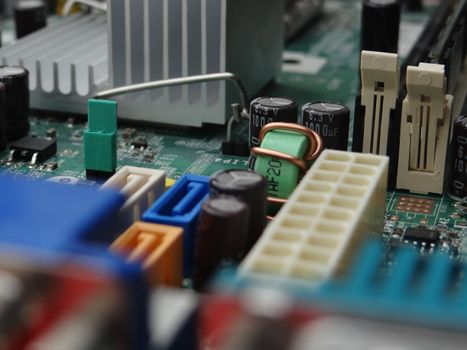 Photo: Djenz Van Eysendeyk / Pexels
Building a gaming PC is a rewarding experience, but like any complex DIY project, it comes with its share of potential pitfalls. Being aware of these common mistakes can save you hours of troubleshooting and frustration. Furthermore, a few essential tips can significantly smooth out your first build, ensuring a successful and enjoyable process. This section will arm you with the knowledge to navigate potential challenges and build your PC with confidence.
**Common Pitfalls to Avoid:**
* **Forgetting the I/O Shield:** This small metal plate that goes into the back of your case before the motherboard is a classic oversight. If you forget it, you'll have to uninstall your motherboard to put it in, which is a major headache.
* **Improper CPU Installation:** Forcing the CPU into its socket can bend pins, rendering both the CPU and potentially the motherboard useless. Always align the markers and let it drop in naturally.
* **Incorrect RAM Installation:** Not pushing RAM sticks in firmly enough, or installing them in the wrong slots (e.g., not using dual-channel configuration), can lead to boot failures or suboptimal performance. Consult your motherboard manual.
* **Forgetting Thermal Paste:** Running a CPU without thermal paste will cause it to overheat rapidly and shut down, potentially causing damage. Always ensure paste is applied (unless pre-applied on the cooler).
* **Loose Power Cables:** Double-check that all power cables (24-pin ATX, 8-pin CPU, PCIe for GPU, SATA for drives) are fully seated and clicked into place. A loose connection is a common cause of a PC not booting.
* **Poor Cable Management:** While primarily aesthetic, bad cable management can obstruct airflow, leading to higher temperatures and reduced component lifespan. It also makes future upgrades or troubleshooting more difficult.
* **Not Installing Drivers:** As discussed, a fresh Windows installation without proper drivers will lead to poor performance, especially for the GPU. Always install the latest drivers from the manufacturers' websites.
* **Ignoring BIOS/UEFI Settings:** Failing to enable XMP/DOCP for your RAM means you're leaving performance on the table. Other settings like boot order are also crucial.
**Essential Tips for a Smooth Build:**
* **Read Your Manuals:** This cannot be stressed enough. Your motherboard and component manuals contain vital information regarding installation, pin layouts, and troubleshooting. Keep them handy.
* **Watch Build Guides:** Before you start, watch several comprehensive PC build guides on YouTube. Seeing the process visually can clarify many steps and build your confidence.
* **Organize Your Parts:** Unpack components systematically. Keep screws and small parts organized, perhaps in small containers or labeled bags. This prevents losing tiny, crucial pieces.
* **Anti-Static Precautions:** Work on a non-carpeted surface. Touch a grounded metal object (like your PC case) frequently, or use an anti-static wrist strap, to discharge static electricity that could damage components.
* **Test Before Final Assembly:** After installing the CPU, cooler, and RAM on the motherboard, consider doing a 'bench test' outside the case. Connect the PSU, GPU (if you have one), monitor, keyboard, and mouse, and try to boot into BIOS. This helps isolate issues before everything is crammed into the case.
* **Don't Force Anything:** If a component isn't going into place easily, stop and re-evaluate. Forcing parts can lead to bent pins, broken clips, or damaged sockets. There's almost always a correct, gentle way for things to fit.
* **Troubleshooting First Boot:** If your PC doesn't boot on the first try, don't panic. Common issues include loose cables, RAM not seated correctly, or an incorrectly installed GPU. Consult your motherboard's debug LEDs or beep codes (if available) for clues. Disconnect everything non-essential (extra drives, peripherals) and try booting with just the CPU, RAM, and GPU.
* **Patience is Key:** Building a PC is not a race. Take your time, enjoy the process, and don't rush. A careful, methodical approach will lead to a much more satisfying and successful outcome. Remember, every expert builder started somewhere, and your first build is a fantastic learning experience.
